World Of Warcraft, WoW Hand Armor

6/15/2011

For Kingdom Heart Lover. ORGANIZATION XIII BIODATA!!!

Organization XIII (XIII機関 Jūsan Kikan?, lit. "XIII Order") is a group of thirteen powerful Nobodieshearts and become whole again. They are the antagonists of Kingdom Hearts: Chain of Memories and Kingdom Hearts II, and all are playable in the game Kingdom Hearts 358/2 Days which happens after Roxas's birth. who seek to reclaim their
Organization XIII debuted in Kingdom Hearts Final Mix, as Xemnas was a secret boss at Hollow Bastion. The group officially debuted in Kingdom Hearts: Chain of Memories, then known as simply, the Organization. In Sora's story, the player was introduced to Marluxia, Axel, Larxene, and Vexen. In Reverse/Rebirth, Riku's story, Zexion and Lexaeus were added to the cast.
The Organization's remaining members appeared in Kingdom Hearts II as the main antagonists. In this second installment, the player meets Xigbar, Xaldin, Saïx, Demyx, Luxord, Roxas, the returning member, Axel, and the leader Xemnas. Another "member" of Organization XIII was added in Kingdom Hearts 358/2 Days, when Xion was added to the group.
Because all the members are Nobodies, they lack hearts, meaning they also have no emotions. The Organization yearns to discover the secrets of the heart and fill the empty void inside themselves by gathering hearts to form Kingdom Hearts so they can become full beings again. Each member is aware of their lack of emotions, and many of them pretend to have emotions, for example, Saïx's enraged battle style and Larxene's giggling and winking. The Kingdom Hearts: Chain of Memories manga and several other media forms provide an alternative view, saying that they do have emotions, but are plagued by a feeling of uncertainty and emptiness due to not having hearts. The manga further displays this "plagued" feeling by showing the members engaging in tasks like jigsaw puzzles, cooking, and reading to try to fill their emptiness.

Story

Origin

Organization XIII was formed by a group of scientists working under a man called Ansem the Wise, the ruler of Radiant Garden, and worked from Ansem's castle, Hollow Bastion. The head of this group was Ansem's apprentice, Xehanort, with the others being Braig, Dilan, Even, Aeleus, and Ienzo. Ansem the Wise began initiating tests about the human heart, focusing mainly on Xehanort, with the hopes of recovering his lost memories. At the urging of Ienzo, he constructed a massive laboratory under the castle. However, Ansem the Wise soon ceased his experiments, for he feared that going too deep would have grave repercussions, also noting Xehanort's apparently-superhuman abilities.
However, his six apprentices, still seduced by the desire for knowledge, conducted their own dangerous experiments on countless subjects. Eventually, they discovered the beings called Heartless, those that are born from the darkness in a heart and seek others as well. Xehanort, having taken on Ansem's name and writing his findings under it, opened a door he discovered, breaking down the barriers between worlds and allowing travel between them. When a king named Mickey arrived, the six men's desire for knowledge eventually caused Xehanort to abandon his body, becoming a Heartless (though he was unusual in that he had a human form and retained his memories), with the other five soon following. Thus, the first six members of Organization XIII were born, and they banished Ansem to a Realm of Darkness.

KINGDOM HEART: CHAIN OF MEMORIES

The Organization make their first appearance in the series (apart from Xemnas's appearance in Kingdom Hearts Final Mix). The neophytes, Marluxia and Larxene, tried to take control of the Organization by using Sora as their puppet by having Namine rewrite his memory, while the senior members, Zexion, Lexaeus, and Vexen, tried to oppose them by using the darkness in Riku. However, all of them, save Axel, who was sent to kill traitors in the group, were eliminated.

KINGDOM HEART : 358/2DAYS

The story largely focuses on Roxas's time as a member of the Organization XIII, and thus, all the members are present here. This, Kingdom Hearts coded and Kingdom Hearts Birth by Sleep are the only installments to date where the fourteenth member, Xion, is ever mentioned due to any memories of her becoming faded since she was a being of memories that ceased to exist.

KINGDOM HEART II

Only eight members (Xemnas, Axel, Demyx, Xaldin, Xigbar, Luxord, Saïx, and Roxas) of the Organization remained at the beginning of Kingdom Hearts II. Sora and his friends took every single remaining member down, save Roxas, who became one with Sora, and Axel, who sacrificed himself so that Sora and his friends could save Kairi. In the end, Organization XIII is ultimately destroyed when Sora and Riku defeat Xemnas.


KINGDOM HEART BIRTH BY SLEEP

While Dilan, Even, Aeleus, Ienzo, Isa, and Lea appear in the game in minor roles, Braig serves as a major player in Master Xehanort's ruthless ambitions, acquiring his signature scars and eyepatch following a battle against Terra. Of Ansem's apprentices, Braig plays the largest role overall in the story until the appearance of Xehanort. Axel, Roxas, and Xion also appear in the game's secret ending, and Xemnas appears briefly in the Final Mix version of the game.

KINGDOM HEART CODED

Inner workings

Dress

The traditional black coat of the members of Organization XIII
Each member in the Organization dons the same uniform, regardless of whether they are male or female. The uniform consists of a single black leather hooded coat. It is plainly adorned with a silver zipper and seemingly pointless silver beaded pull strings for the hood that form a semi-circle in the middle. Each member wears their zippers at differing points.
Not much is known about the under garments of the Organization. It is known, however, that they all wear hakama-esque black pants and knee high silver trimmed boots, with the exceptions of Roxas, who wears sneakers of the same color, and Larxene and Xion, who wear a more feminized version of the boots with heels. In addition to this, they all wear black leather gloves of some unknown length, as they disappear under bell shaped sleeves. Some members have different looking coats, for example Axel, whose sleeves are tight around his wrists. Upon closer inspection, it can be seen that the hems of each coat are each slightly different, as well as the shoulder pads (such as those of Demyx and Xigbar, which seem to be slightly pointed).
Other known characters to wear the coat are King Mickey, Riku, Xehanort's Heartless, and Moogles. Riku obtains his coat from DiZ and it is presumed Mickey also obtains it from him. It is unknown how DiZ or the Moogles obtained them.
The reason that Organization XIII wears black coats is because Master Xehanort, one of Xemnas's original beings, once wore one. As Xemnas regained his memories, he remembered the black coat that was worn by Master Xehanort, and incorporated the coat into Organization XIII.[1]

Ranking

Ranks within the Organization have little to nothing to do with power. While Xehanort's Nobody, known as Xemnas, is the strongest as well as the leader, the rest fall in the order they joined. Thus, their numbered rank is not necessarily representative of their status and power within the Organization. As the group's name describes, one would assume that there are a total of thirteen members. Until the announcement of Kingdom Hearts 358/2 Days, this was true. Besides having a numerical rank, each member also has an assigned title. The only exception to this is Xion, who is not actually a true member of the order. The ranks and titles are as follows:
  1. Xemnas; "The Superior of the In-Between;" Controlled Sorcerers, used the attribute of Nothingness and weapons called Ethereal Blades which he himself calls Interdiction. Nobody of Xehanort
  1. Xigbar; "The Freeshooter;" Controlled Snipers, used the attribute of Space and Arrow Guns called Sharpshooters. Nobody of Braig
  1. Xaldin; "The Whirlwind Lancer;" Controlled Dragoons, used the attribute of Wind and six Lances called Lindworm. Nobody of Dilan
  1. Vexen; "The Chilly Academic;" used the attribute of Ice and a Shield called Frozen Pride. Nobody of Even
  1. Lexaeus; "The Silent Hero;" used the attribute of Earth and an Axe Sword called Skysplitter. Nobody of Aeleus
  1. Zexion; "The Cloaked Schemer;" used the attribute of Illusion and a Lexicon called Book of Retribution. Nobody of Ienzo
  1. Saïx; "The Luna Diviner;" Controlled Berserkers, used the attribute of Moon and a Claymore called Lunatic. Nobody of Isa
  1. Axel; "The Flurry of Dancing Flames;" Controlled Assassins, used the attribute of Fire and twin Chakrams called Eternal Flames. Nobody of Lea
  1. Demyx; "The Melodious Nocturne;" Controlled Dancers, used the attribute of Water and a Sitar called Arpeggio. Original persona unknown. 
  1. Luxord; "The Gambler of Fate;" Controlled Gamblers, used the attribute of Time as well as Cards called Fair Game. Original persona unknown. 
  1. Marluxia; "The Graceful Assassin;" used the attribute of Flower and a Scythe called Graceful Dahlia. Original persona unknown. 
  1. Larxene; "The Savage Nymph'" used the attribute of Lightning and eight Knives called Foudre. Original persona unknown. 
  1. Roxas; "The Key of Destiny;" Controlled Samurai, used the attribute of Light and wielded up to three different Keyblades (due to being Sora's Nobody). He initially wielded the Kingdom Key but soon acquired the Oathkeeper and Oblivion, which represent Kairi and Riku, respectively. 
  1. Xion; used the attribute of Light and the Kingdom Key Keyblade. Although she is referred to as the fourteenth member, she is not actually considered to be part of the Organization, and she is not a Nobody. She is an imperfect replica of Roxas created from Sora's leaked memories. 

Difference

There are a few major differences between the Nobodies within the Organization and the ones that SoraNobody symbol (which doubles as the logo for the Organization). frequently encounters throughout the game. The average type that Sora fights often have strange features, enhanced speed, metallic skin in shades of white, silver, and blue, and the trademark

Lesser Nobodies

A few select members of the Organization have control over the other, weaker Nobodies, though this is only shown in Kingdom Hearts II. The members from Kingdom Hearts: Chain of Memories may also have had that ability, or rather, would have, had they all survived to the second game. Like their titles, each member's lesser Nobody has some similarity to them. These lesser Nobodies are called Sorcerers, Snipers, Dragoons, Berserkers, Assassins, Dancers, Gamblers, and Samurai. Sorcerer Nobodies are under the command of Xemnas. They float over the ground constantly, possessing a grace much like that of Xemnas, and utilize large cubes of nothingness in several ways.
They are the most powerful and rarest of the lesser Nobodies. Sniper Nobodies are controlled by XigbarXaldin because of his affinity with wind, and possess a singular lance that mirrors the six that he fights with. Berserker Nobodies are under Saïx's power and, as with the previously mentioned lesser Nobodies, hold a weapon identical to that of their master. and, like him, carry spiky guns that shoot small red crystallized lasers. Dragoon Nobodies are controlled by
An observant player will also notice that Berserker Nobodies go through random surges of anger, much like Saïx when he draws upon the power of the moon. Next are the Assassin Nobodies. This group is under Axel's control, capable of becoming a circular form similar to Axel's weapon, hiding away for short periods of time before attacking, and causing powerful explosions. Dancer Nobodies are the most colorful of all the lesser Nobody, featuring bright colors such as orange and pink. They are Demyx's servants and relate to him due to his musical nature. The Gambler Nobodies are under Luxord's rule. Luxord, being a gambler of many things, fights with cards, which they use as well, along with several dice. The final of these lesser Nobodies are Samurai, which Roxas controls. Samurai wield two katana just as Roxas wields two Keyblades, Oblivion and Oathkeeper. The Lesser Nobodies are named after recurring Final Fantasy job classes and share similar traits with them such as the Dragoons ability to jump.

Naming

Roxas is given his name and a purpose by Xemnas
A common thread between all of the members is the "X" that appears within each of their names. As revealed by Tetsuya Nomura, the director of the game, by removing the "X", the remaining letters form an anagram of the members' original names from when they were humans. For instance, "Roxas" is an anagram of "Sora", and "Xemnas" is an anagram of "Ansem". Xemnas's true name is Xehanort; his name is an anagram of 'no heart' or 'another' with an X added. Xion, being an artificial Replica, had no original name. The name "Xion" came from her label as Replica No.i of the Replica Program.
Such thoughts made many fans anxious to try and figure out for themselves the rest of the Organization's members' names. The name of the Nobodies' "other" appears before them in translucent, rainbow colored font (similar to the one shown at the intro to "The World That Never Was"). Then, an "x" drops down and the letters re-arrange themselves until they form a new name. It is also suggested that Xemnas is the one who performs this ceremony. Many have suggested that this isn't true, as Xigbar was the one who found Marluxia and named him, but if one listens to the dialogue between Zexion and Xigbar in Kingdom Hearts II Final Mix, it is apparent from the way Xigbar does not know how to pronounce Marluxia's name that he was not the one to name him, rather just found him.


WHERE NOTHING GATHERS

Somewhere in The Castle That Never Was, inaccessible to the player, is the meeting room of the Organization. This area can be accessed with a cheat code, though - the platform with the Organization symbol can be walked on, but none of the thrones can. The game calls the area "Where Nothing Gathers" - suggesting it may have been in the final game as a full area, but was dropped later. It is a white cylindrical room with thirteen extremely tall white thrones. The height of these thrones is determined by the amount of missions the respective members complete and the height tends to change depending on the success or failure of those missions. However, Xemnas' throne is always the highest as he is the leader and therefore has completed the highest amount of missions. To his left are the odd-number ranked members while to his right are the even-numbered. Starting from Xemnas, clockwise: Xaldin, Lexaeus, Saïx, Demyx, Marluxia, Roxas, Larxene, Luxord, Axel, Zexion, Vexen and Xigbar


PROOF OF EXISTENCE

Ultimate Fate

By the time of Kingdom Hearts II, the actions of Sora, Axel, Riku, and the Riku Replica, in addition to the departure of Roxas, reduced the Organization's roster to eight, which were then slain by Sora one-by-one (with the exception of Axel, who sacrificed himself to allow Sora to go and save Kairi) until only Xemnas remained. Ultimately, Xemnas fell at the hands of Sora and Riku, and Roxas (now a part of Sora once again, but still somewhat independent, as seen in the ending video before the credits) could be considered the sole surviving member.
I. Xemnas - Defeated by Sora and Riku at the end of Kingdom Hearts II. He was trying to dispose of the only threat standing between him and Kingdom Hearts. Disappeared in Darkness in what appears to be a black variation of the white Nobody thorns. He was the thirteenth and final member to fall, but since both his Heartless and Nobody have been slain, Master Xehanort is now able to return from the darkness.
II. Xigbar - Defeated by Sora, Donald, and Goofy in the Hall of Empty Melodies in The World That Never Was. He started the fight to try to prevent Sora and company from ascending any farther up the castle but disappeared into Darkness. He was the ninth member to disappear.
III. Xaldin - Defeated by Sora, Donald, Goofy, and Beast at Beast's Castle. He was on a mission to turn the Beast into a Heartless and Nobody. Disappeared into Darkness and wind. Xaldin was the seventh member subject to elimination.
IV. Vexen - Defeated by Axel as a way to gain Marluxia's trust. Vexen opposed Marluxia's plot and Marluxia wanted him eliminated. Disappeared by incineration into Darkness. He was the first member to fall.
V. Lexaeus - Defeated by Riku while possessed by Ansem, Seeker of Darkness. He was trying to make Riku use the Darkness inside him. From what is shown in the cutscene of his elimination, he was helpless against Ansem, Seeker of Darkness due to his weakened condition after his brutal fight with Riku. He disappeared into Darkness, and was the third member eliminated.
VI. Zexion - Defeated by Riku Replica and Axel. Axel wanted no evidence of his actions in Castle Oblivion, so when Zexion was extremely weary from his battle with the real Riku, Axel had the Riku Replica absorb Zexion. He disappeared into gaseous Darkness while engulfed in the Replica's energy. Zexion was the fifth member to fall.
VII. Saïx - Defeated by Sora, Donald, and Goofy. He was confronted simply to try to eliminate the last of the Organization. He disappeared into gaseous Darkness. He was the eleventh to be defeated.
VIII. Axel - The only Organization member not killed by anyone. He was eliminated in a sacrificial attack to save Sora from an army of Dusks. Similar to a fire, he seemed to "burn out" into Darkness, resembling ashes. Axel was the eighth member to fall.
IX. Demyx - Defeated, by Sora, Donald, and Goofy. He was one of the few mentionable people destroyed in the Battle of 1,000 Heartless. He confronted Sora and company just for the sake of battling in the war. He disappeared into Darkness and appeared to have boiled up and evaporated. He was the sixth member to disappear.
X. Luxord - Defeated by Sora. He captured Donald, Goofy, Riku, and Kairi, forcing Sora into one of Luxord's "games." Sora was able to beat him by "winning the game" and slashing through his shield of cards. He disappeared into gaseous Darkness. Luxord was the tenth member to be eliminated.
XI. Marluxia - Defeated by Sora. He was trying to destroy Sora since he couldn't control him. Marluxia himself is never actually fought, but after Sora destroys a clone, a machine-like Nobody and an angel-like, feminine reaper, all Marluxia's energy is gone and he is beaten. He disappeared attempting to grab Sora in gaseous Darkness in a flurry of flower petals. Marluxia was the fourth member to disappear.
XII. Larxene - Defeated by Sora, Donald, and Goofy. She was on a mission to kill Sora after her plan fell apart. She would have succeeded, but an attempt to save Sora by Naminé, Donald, and Goofy gave him the strength to fight back, and Larxene eventually met her end. She disappeared into Darkness. Larxene was the second member to fall.
XIII. Roxas - Arguably the only surviving member. Roxas permanently sealed himself within Sora just before the final battle with Xemnas, willingly giving up his physical existence. Although he is not gone, he was the twelfth member to "fall".
XIV. Xion - While technically not an official member, she was still part of the Organization for a while. She was defeated by Roxas while battling him and then faded away to join with Sora. If she was considered a member, she would be the sixth to be defeated.

For Kingdom heart Lover. ROXAS Boss

The battle with ROXAS takes place during the visit to THE WORLD THAT NEVER WAS The fight is only playable in Kingdom Heart II

Strategies

Dark City

The battle will always start out with Sora within his attack range. Just as the battle commences, Roxas will immediately use "Criss-Cross" where he twirls his Keyblades in a wide cross-circle. You can tell when he is about to use it by hearing him yell "Hup!" and hear the "ting" of his Keyblades surging with power from the attack. Inexperienced or unready players may be hit with this. Players can either move closer and cast Reflect to damage Roxas, jump out of the way, or Dodge Roll.


Roxas will counter any extended combo attack with his own. It is best to not use too many combos at once.
Roxas will often use "Aerial Roll" (which looks similar to Sora's Aerial Finish but much more aggressive) which closes in on Sora very quickly from any distance by jumping in the air and rolling mid-air, hurting Sora if the player does not block the attack.


Roxas can use Sora's Quick Run but at a much higher speed. Using light energy he leaves behind a lens flare to immediately use "Criss-Cross".


After a bit of a beating he gets even more aggressive.


Roxas will start using "13 beams" where he will start slashing about, sending beams of light (shaped like the Nobody insignia, showing his devotion to Organization XIII) at Sora. After he sends out about 8-9 beams he will dash forward and send out the last behind him as to hit anyone who might have moved behind him.


He also use "Enhanced Aerial Roll" where he as usual leaps and closes in on Sora, but at the same time summons beams of light to maximize his attack range, making it even harder on Sora to dodge this one without the use of guarding against Roxas or "reflecting" the attack all together.


Roxas may start "Duel Stance" which is a variation of Roxas's Samurai Nobodies' "Dual Stance". But instead of hurting Roxas, it knocks him away and "steals" Roxas's Keyblades temporarily. Roxas, not willing to give up a fight without his weapons, will start using his magic to counter his loss.


He may use his desperation attack, "Magic Hour" which is a furious attack where Roxas wants to use all of his power to eliminate Sora in one strong finisher. He summons light beams as a sort of shield and rises into the air glowing with energy and sends out even more energy to the background revealing the area where Sora unlocks Keyholes to other worlds. When he shouts "Come on!", he summons a pair of light orbs as he twirls both of his Keyblades to send out homing energy projectiles at Sora. The best way to dodge this one is to keep on moving to one side of the field, dashing, gliding, or rolling.


After tapping into his rage when he begins to use Criss-Cross, he summons light beams yet again as a rotating shield before he uses it as well as send them out at the same time he finishes, hoping for the beams to catch Sora even if he's far away.


He has yet another feature of Sora's, which is the "Shockwave Thrust". Roxas will dash forward with a blinding speed with one of his Keyblades pointed forward while propelling himself with his powers. Again, simple tactics are Reflect, Guard, or jump away.


His proficiency with Keyblades is also shown when he can spin his Keyblades in the same fashion as Sora's Final Form, signifying where Final Form learned that attack.
Note: As he takes damage, Roxas will leave but a second for Sora to react to his attacks. Key timing and planning is best to memorize for this battle.


Data Rematch

In the data rematch, use Dodge Roll, Reflect, Guard, and melee attacks to your full ability - Roxas has a
 greater tendency of using his light shields. His health has also greatly increased, making the fight more dangerous. The best strategy is to use the Duel Stance Reaction Command whenever possible and steal his Keyblades. Once you have them, hit Roxas with everything you got! But so long as the player heals periodically, Roxas will fall with ease.

Roxas
Roxas - Oathkeeper and Oblivion.pngBlack Hooded ROXAS Roxas Days 2.png

6/14/2011

Justin bieber LOVE ME

For akatsuki Lover!, Akatsuki Biodata

The Akatsuki Organization
Akatsuki
     The "Akatsuki" kanji means daybreak, breaking down the word itself gives us "aka" meaning red and "tsuki" meaning moon. Akatsuki was founded in the Rain Country by Yahiko, Konan and Nagato. Yahiko wanted to bring peace to the bloody, war-ridden country and sought like minded individuals at his side. When he met Rain leader Hanzou to talk peace, he was betrayed by the man and had to kill himself to save Konan's life. After being traumatized by Yahiko's death, Nagato adopted a new harder outlook on how to achieve peace as the group's new leader.

Akatsuki      Around this time the group became affiliated with a man claiming to be Uchiha Madara. The masked figure used his power and influence to secretly run the group and draw in new more deadly allies from throughout the world. Under Madara, Akatsuki began to attract new S-Ranked criminals. Many of these are missing-nins who fled their villages after causing death and destruction. Over time most of the Akatsuki members were killed or neutralized in battle. There are currently only 2 active Akatsuki members: Tobi (Uchiha Madara) and Zetsu. Most members wear a forehead protector from their hidden village with a scratch through it, and all wear a ring identifying their position in the organization and a black cloak with red clouds. In the early years of the group, they acted as mercenaries for hire, offering their services to villages wary of taxing their own resources. While travelling about, the group members will work in groups of two collecting knowledge of new skills and jutsu.

Akatsuki      
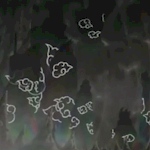
Akatsuki seeks to capture the Bijuu and their hosts the "Jinchuuriki," meaning the power of human sacrifice. These are the individuals possessing bijuu (tailed beasts) within their bodies. The demons are known by the number of tails their body possesses. When the Bijuu is removed from the Jinchuuriki's body, the host dies. All the captured hosts lost their lives save for Gaara, who was later resurrected with a tensei jutsu. The only remaining Bijuu are the Eight-Tails and the Nine-Tails within Naruto. Akatsuki's current base of operation is unknown, however they have multiple bases to which they can travel. These bases are used to summon the gigantic King of Hell statue known as Gedou Mazou. The statue's mouth is bound and his hands are cuffed. Each respective finger of the statue's hand represents the Akatsuki member. Each statue finger thus represents the kanji and ring finger of the member.

Akatsuki       The members have the ability to project their presence to their base, this allows them to remain out and about and still conduct the business of Jinchuuriki demon extraction. This process takes three days and nights due to the absence of Orochimaru. This length of time goes for both free roaming bijuu and bijuu enhanced Jinchuuriki. To begin to leach the power from the Jinchuuriki, the members will use the sealing technique of GenryuuKyuu Fuujin (Mystical Dragon Nine Exhaustion). This causes the mouth of the statue to open. Nine spectral dragons will emerge to coalesce around the Jinchuuriki to begin the extraction process. When extraction is completed, the bijuu spirit will be sealed within the statue and one of its eyes will open denoting a captured bijuu spirit. The Jinchuuriki themselves will fall back to the earth, dead.


     Akatsuki's ultimate goal is to control the world. This would be accomplished through capturing and sealing away the Bijuu into the Gedou Mazou statue. The tailed beasts were once part of one more powerful creature known as the Juubi. The first ninja, Rikudou Sennin, split the Juubi's soul from its body and sealed it within himself. He then encased its body in rock to create the moon. When his life was nearing its end, he split the Juubi out into 9 separate Bijuu. Akatsuki sought to recombine these Bijuu back into the Juubi. Uchiha Madara would then embue the Juubi into himself, to gain enough power to cast a permanent Genjutsu on the moon known as his "Eye of the Moon" plan. One which would make him the supreme power in the world and cause "peace" under his rule. To that end, Madara used the genetic material of Shodai Hokage and the captured Yamato, to greatly bolstered his army of White Zetsu. Madara then aligned with the Orochimaru tissue-infected Yakushi Kabuto, who was working towards his own ends. With Kabuto's increase in power, he cast Edo Tensei, resurrected scores of dead ninja, including many former Akatsuki members. With a combined army of White Zetsu and resurrected ninja, Madara declared war on the world and the Fourth Great Ninja War began.
The Gear
Ring and Manicure
Ring Drawn from ancient Chinese and Japanese lore, the kanji on each ring have served in the past as representations of Gods, to help in concentration before battle and in protection from evil. Their ring placement on their finger corresponds to their position on the summoned statue, with each member wearing the ring on a different finger. The rings seem important to each member, as Deidara was set on finding his when it was lost. Orochimaru also took his when he left the group, which apparently denied the group the ability to replace him with someone new. With Sasori's death, Tobi was eager to get his ring and join, but he would need to go through their entrance requirements first.

The Akatsuki member also has manicured and painted nails.
Forehead Protector
Protector Each member wears the traditional forehead protector of the hidden village from which they fled. The protector has been modified though to bear a large scratch through the symbol, showing they no longer hold the same ideals their village does.
Cloak
Cloak Each member wears a black cloak that bears red clouds. The inside of the cloak is red in color. The cloak is knee length and has a high collar. Underneath the cloak the ninja is seen to wear the more traditional clothing of their home village.
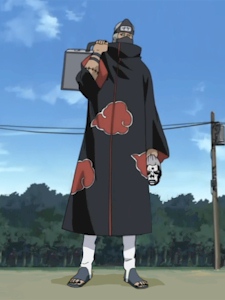
Hat
Hat Members wear a traditional bamboo hat (kasa) to hide their appearance when traveling. The hat will be removed when the member enters battle.
The Members
Pain [Nagato] (Former Member - Deceased)
Pain
Click for alternate form
First Manga Appearance: Ch. 363
First Anime Teaser Appearance: Ep. 135
Hidden Village: Rain
Ring: Rei (Zero)
Finger Position: Right Thumb
Info: Pain acts as the leader of the group, though he and Konan secretly reported to Tobi. He has been adamant that the group can fulfill their desires if they finally possess the bijuu. Pain's true form is that of Nagato, a frail man who uses a mechanical walker to transmit the chakra signals which manipulate the six Realm bodies. After attacking Konoha, he fought Naruto, losing all his Realm bodies in the process. After speaking with Naruto, he learned they both shared similar philosophies. Being moved by Naruto's personality and will power, Nagato hardened persona regained some hope in the future. Using the last of his power, he revived all those he killed at the cost of his life to atone. He was later resurrected using Kabuto's Edo Tensei jutsu.
Leader
Zero
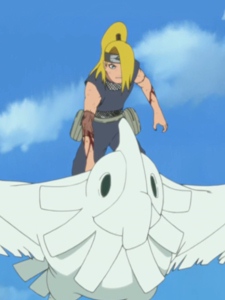
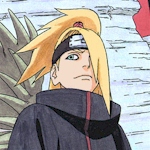
Deidara (Former Member - Deceased)
Deidara
Click for alternate form
First Manga Appearance: Ch. 247
First Anime Appearance: Shippuuden Ep. 2
Hidden Village: Rock
Ring: Sei (Blue-Green)
Finger Position: Right Index
Info: Deidara is from Hidden Rock and he utilizes mouths on his palms to create exploding art. He left his village behind to work as a terrorist for anti-nationalists. He was then invited into Akatsuki. He and his partner Sasori were responsible for capturing the One-Tail Jinchuuriki Gaara. Though he lost both arms in battle, both were reattached. After Sasori was killed, Tobi became his partner. Deidara later squared off against Uchiha Sasuke. Unfortunately Sasuke's Sharingan and his Lightning Element attacks got the better of Deidara's Earth based Exploding Clay. In anger, Deidara chose to self-detonate himself to show the true beauty of his art. He was later resurrected using Kabuto's Edo Tensei jutsu.
Deidara
Blue
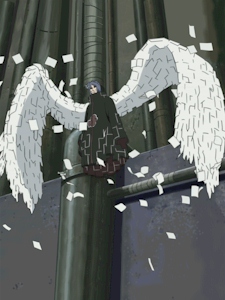
Konan (Former Member - Deceased)
Konan
Click for alternate form
First Manga Appearance: Ch. 363
First Anime Teaser Appearance: Ep. 135
Hidden Village: Rain
Ring: Byaku/Haku (White)
Finger Position: Right Middle
Info: Konan is the lone female member of the group. She works alongside Pain. Konan possesses the ability to disperse her body into paper, which can then fold itself into butterfies for tracking purposes. When she was younger, she, Nagato and another orphan named Yahiko were trained by Jiraiya for a short period. He helped them become stronger and able to fend for themselves in the war torn Rain Country. She followed her friends in battle and saw her friend Yahiko die and Nagato become Pain. After Nagato entrusted his will to Naruto, she did as well. She returned to Rain with the bodies of her fallen friends and left the group. When Madara sought Nagato's Rinnegan, he fought Konan in battle. He eventually delivered a critical blow and found the information he needed.
Konan
White
Uchiha Itachi (Former Member - Deceased)
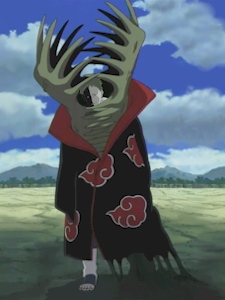
Itachi
Click for alternate form
First Manga Appearance: Ch. 139
First Anime Appearance: Ep. 80
Hidden Village: Leaf
Ring: Shu (Scarlet)
Finger Position: Right Ring
Info: After murdering everyone in his clan, Uchiha Itachi fled his village and joined Akatsuki. Itachi was partnered with Hoshigaki Kisame. They were assigned to capture the Nine-Tails Jinchuuriki Naruto. They attempted to capture Naruto once, but fled when confronted by Jiraiya. Itachi finally faced his brother Sasuke in battle and died. After the battle, Uchiha Madara revealed that Itachi had did everything for Konoha's well being, even sacrificing himself to help keep Sasuke out of Madara's hands. He was later resurrected using Kabuto's Edo Tensei jutsu.
Itachi
Red
Zetsu
Zetsu First Manga Appearance: Ch. 234
First Anime Appearance: Ep. 134
Hidden Village: Unknown (Potentially Grass)
Ring: Kai (Boar)
Finger Position: Right Little
Info: Zetsu appears venus-fly trap-like in appearance. His main body is split into two halfs, both light and dark. He appeared to be traveling alone when he spied on Naruto and Sasuke's battle at the Valley of the End. For a period he was teamed with non-Akatsuki member Tobi. Once Tobi was admitted into the group, it appears Zetsu once again works alone.
Zetsu
Boar
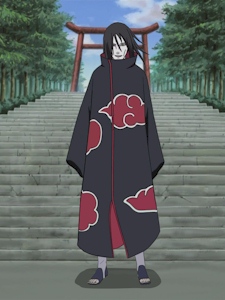
Orochimaru (Former Member - Neutralized)
Orochimaru
Click for alternate form
First Manga Appearance: Ch. 49
First Anime Appearance: Ep. 27
Hidden Village: Sound
Ring: Sora (Sky)
Finger Position: Left Little
Info: After being passed over for Fourth Hokage, Orochimaru began to study forbidden jutsu. He then fled Leaf and joined Akatsuki. He was partnered with Sasori during this period. Orochimaru coveted Uchiha Itachi's Sharingan. He moved to take Itachi's body but Itachi bound Orochimaru with Genjutsu and cut off his arm. Orochimaru fled and took his ring with him. He would later form Hidden Sound and train Itachi's brother Sasuke. When he moved to insert his spirit into Sasuke, the young man bound Orochimaru in Genjutsu and suppressed him. Orochimaru's underling Kabuto also inserted some of Orochimaru's flesh into his body, which soon exerted its will by gradually taking over his body.
Orochimaru
Sky
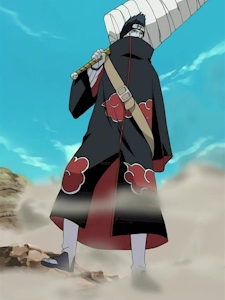
Hoshigaki Kisame (Former Member - Deceased)
Kisame
Click for alternate form
First Manga Appearance: Ch. 139
First Anime Appearance: Ep. 80
Hidden Village: Mist
Ring: Minami (South)
Finger Position: Left Ring
Info: Kisame engaged in murder and rebellion in his home country, fleeing Mist he joined Akatsuki. Kisame is partnered with Uchiha Itachi. He was assigned to capture the Yonbi Jinchuuriki and did so with little difficulty. When he was sent to capture the Hachibi Jinchuuriki Killer Bee, he was forced to merge with Samehada. Unfortunately Samehada liked the taste of the Hachibi chakra and betrayed Kisame. Kisame then faked his death and infiltrated the Lightning Country inside his former sword Samehada. He was eventually discovered and fought Might Guy in battle. He managed to deliver the data he gathered to Akatsuki and then killed himself to prevent the shinobi alliance from gather any intelligence from him.
Kisame
South
Kakuzu (Former Member - Deceased)
Kakuzu
Click for alternate form
First Manga Appearance: Ch. 312
First Anime Teaser Appearance: Ep. 135
Hidden Village: Waterfall
Ring: Hoku (North)
Finger Position: Left Middle
Info: Kakuzu is a missing-nin from Hidden Waterfall. He and his partner Hidan were responsible for acquiring the Two-Tailed Jinchuuriki. He was a bounty hunter who often got sidetracked on bounty hunts. His body was stitched together by strange tendrils which he used to rip out the hearts of his opponents and then insert into his own body. This granted him their elemental affinities in the form of masked tendril entities. Along with his own Water affinity, he had access to Wind, Fire, Earth and Lightning attacks. Kakashi destroyed the Earth Heart, Hidan accidentally destroyed Water and Naruto destroyed Wind and Fire. Kakuzu was then finished off by Kakashi. He was later resurrected using Kabuto's Edo Tensei jutsu.
Kakuzu
North
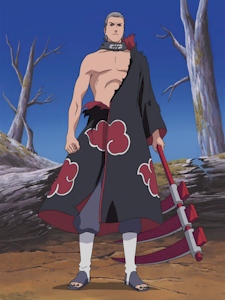
Hidan (Former Member - Neutralized)
Hidan
Click for alternate form
First Manga Appearance: Ch. 312
First Anime Teaser: Ep. 135
Hidden Village: Hot Springs
Ring: San (Three)
Finger Position: Left Index
Info: Hidan bears a large rope scythe and he admits that he is the slowest attacker of the group. He hails from Hot Springs village. He and his partner Kakuzu were responsible for acquiring the Two-Tailed Jinchuuriki. Hidan practices an evil god cult religion named Jashin. This religion loves chaos and death, and Hidan himself is near immortal due to the Kinjutsu used on him by Jashin. On one of Kakuzu's side bounty trips, he killed Sarutobi Asuma in battle using his Jashin Kinjutsu. He was eventually blown up and buried deep underground by Shikamaru. Because the Kinjutsu allows him to live only as long as he kills and performs his rituals, his burial underground may eventually cause his death.
Hidan
Three
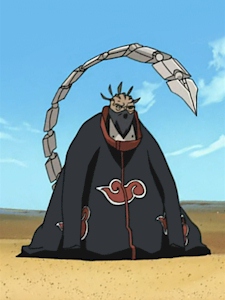
Akasuna no Sasori (Former Member - Deceased)
Sasori
Click for alternate form
First Manga Appearance: Ch. 247
First Anime Appearance: Shippuuden Ep. 2
Hidden Village: Sand
Ring: Tama (Sphere)
Finger Position: Left Thumb
Current Status: Deceased
Info: Sasori (meaning scorpion) traveled with Deidara from Hidden Rock. He was a legendary puppet master from Hidden Sand who left his village approximately 20 years before the start of the series. Sasori converted portions of his body into puppet parts, retaining a flesh and blood portion of his original self in a chest container. He used the "hitokugutsu" method to turn people into puppets while still alive, allowing him to use their jutsu even after their "death." He fell in battle to Chiyo and Sakura, hesitating to not avoid the lethal strike of his parents who had been made into puppets. He was later resurrected using Kabuto's Edo Tensei jutsu.
Sasori
Sphere
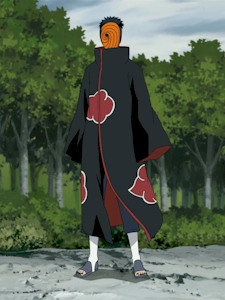
Tobi / Uchiha Madara
Tobi
Click for alternate form
First Manga Appearance: Ch. 280
First Anime Teaser Appearance: Shippuuden Ep. 32
Hidden Village: Leaf
Ring: Tama (Sphere)
Finger Position: Left Thumb
Info: Tobi was initially appeared clumsy and was very polite in his speech. After Sasori was killed in battle, he took over Sasori's position in the group. He was then partnered with Deidara. After Deidara's death, it was revealed Tobi gave direction to Pain as the real Akatsuki leader Uchiha Madara. The full nature of Tobi and Madara's full identity is unknown, however he has acted in ways which seem to confirm his nature as Madara. Madara's ultimate goal being to collect the 9 Bijuu and re-create the Juubi, which he will then use to cast a mind-controlling Genjutsu on the moon, which he can use to control the world.
Tobi
Sphere
The Groups
Deidara and Sasori

Deidara and Sasori were known for being artists. Deidara uses clay to model his explosive animals and Sasori was a master puppet maker. Deidara acted as the junior in their partnership, deferring to Sasori as the stronger ninja. This did not stop them from getting into spats about the nature of art though. After Sasori's death, Tobi assumed his position and role as Deidara's partner. Deidara was assigned to capture the Ichibi and Tobi the Sanbi. Sasori did not know where his Jinchuuriki was. It is unknown if this was the Sanbi or some other individual.
Deidara and Tobi

Deidara and Tobi share a very strained relationship. Always eager to impress his new teammates, Tobi is prone to excitement. This often annoys Deidara who tries to do his best to show Tobi what it means to be an Akatsuki member. Tobi was assigned to capture the Sanbi. Though he boasts that he took out the beast himself, he was helped in his assignment by Deidara.
Hidan and Kakuzu

Hidan and Kakuzu work together and share a somewhat testy relationship. Hidan follows a very strict religion, which annoys Kakuzu with its long rituals. Hidan is very defensive of the religion, causing Kakuzu to often get tired of his partner's diatribes. Kakuzu on the other hand often makes side-trips to collect bounties, which annoys Hidan. Hidan was assigned to capture the Nibi. It is unknown what tailed beast Kakuzu was assigned.
Itachi and Kisame

Itachi and Kisame work together and form a rather strong partnership. Both men seem to respect each other and Kisame seems to act as the junior in the group, deferring to Itachi's decisions. Itachi was assigned to capture the Kyuubi and Kisame was assigned the Yonbi.
Pain and Konan

Pain and Konan work together, carrying out a partnership that has lasted since their youth in the Rain Country. Both report to Uchiha Madara, who operates in the guise of Tobi.
Associates
Yakushi Kabuto
Kabuto Several years before the series started, Kabuto worked for Sasori as a spy. He operated under Sasori's memory block jutsu and was placed into Orochimaru's confidence in the hopes of learning more about Orochimaru's body transfer jutsu. However, Orochimaru removed the memory block jutsu and the young man was impressed enough by Orochimaru that he chose to join him. Sasori was ignorant of this fact and had scheduled a meeting with Kabuto. Kabuto went to the meeting playing the part of his loyal spy, but he planned to kill Sasori with the help of Orochimaru. When Orochimaru himself was later neutralized by Sasuke, Kabuto implanted some of Orochimaru's tissue into his body, gaining new power in the process as it began to take over his body. He then located Uchiha Madara and offered his services to Akatsuki once again. To prove he was trustworthy, he resurrected Deidara, Itachi, Kakuzu, Nagato and Sasori. He then worked alongside Madara to control his many resurrected ninja during the Fourth Great Ninja War.
Team Hawk
Team Hawk After Uchiha Madara revealed the true events behind Itachi's actions, Sasuke chose to side with the legendary ninja against Konoha. After that revelation, he changed the name of his team from "Snake" to "Hawk". The group then donned Akatsuki robes and set out to capture the Eight-Tails Jinchuuriki for Madara. The group then infiltrated the meeting of the Five Kage, with Sasuke eventually abandoning the others to find revenge against Danzou. During the battle with Danzou, Sasuke sacrificed Karin's safety to kill the elder ninja from Konoha. The gravely wounded Karin was eventually captured by Konoha and expressed willingness to leave her ties to Akatsuki and Sasuke behind for good. Suigetsu and Juugo's current ties to Sasuke and Akatsuki are unknown.
Ginji
Ginji Former Akatsuki member Kakuzu was a bounty hunter and obsessed with wealth. He used the services of Ginji to manage his extensive wealth. After his death, Team Snake sought out Ginji to learn about Akatsuki's whereabouts.
Yuura
Yuura Yuura has served as a trusted member of the Kazekage advisory council for four years. Little did Yuura know that he had been placed under a memory block jutsu for over a decade. This block was placed by his former master Sasori. The block made Yuura forget that he was actually gathering data and serving as a plant to wipe out the Sand's defenses. When Sasori returned to Hidden Sand, he activated Yuura and removed the memory block. Returning to his masters commands, Yuura wiped out the Sands defenses, allowing them easier access to capture Gaara. Yuura was later used in a sacrifical jutsu to provide a host body for Uchiha Itachi to inhabit when he fought Kakashi and Naruto. Zetsu later ate his body for sustenance.
Mukade
Underling Mukade served was an underling of Akatsuki member Sasori. He was used as a sacrifice to take on the form of Hoshigaki Kisame in Pain's Shouten no Jutsu. Kisame fought Guy and managed to imprison Neji, Lee and TenTen. Guy was forced to open several gates and used his Asakujaku technique to pummel "Kisame" and defeat him. In the rubble, the body of Mukade lost its appearance and revealed to Guy that they had not actually been fighting Kisame at all.
Zangei
Bounty Master Zangei was a bounty exchange master who ran one of the disposal centers located in Fire Country region. The center was located in a secret area accessed through a men's restroom. Akatsuki member Kakuzu often used this center to drop off corpses of the bounties he had collected. Zangei would gladly pay Kakuzu for his services. He was later captured by Konoha and taken in for interrogation by Morino Ibiki.
The Jinchuuriki and their Bijuu
Gaara and Ichibi
Gaara First Manga Appearance: Chapter 35
First Anime Appearance: Naruto Episode 20
Hidden Village: Sand
Rank: Kazekage
Bijuu: Shukaku the Ichibi (One-Tailed Tanuki Demon)
Power: Mini-Shukaku form ~ protective sand tanuki form, automatic sand defense
Drawbacks: If Gaara sleeps Shukaku can take control
Status: Captured
Akatsuki Member: Deidara
Info: Chiyo imbued the demon Shukaku into the Kazekage's son Gaara. Gaara lead a lonely life until he met Uzumaki Naruto. He pledged himself to prove his worth and protect his village. His drive led him to become Kazekage. He was defeated in battle by Deidara and Akatsuki removed the Shukaku demon from within Gaara, killing him.
1 Tail
Nii Yugito and Nibi
Yugito First Manga Appearance: Chapter 312
First Anime Appearance: Shippuuden Episode 71
Hidden Village: Cloud
Rank: Jounin
Bijuu: Two-Tailed Cat Demon
Power: Fiery mouth blasts
Drawbacks: Unknown
Status: Captured
Info: Yugito was a kunoichi from Hidden Cloud. Like Gaara and Naruto, she was an active part of her village. She contained the two-tailed cat demon, which was defeated in battle by Hidan and Kakuzu. Akatsuki then removed the Nibi from within Yugito, killing her.
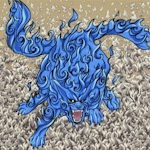
2 Tail
Yagura and Sanbi
Yagura First Manga Appearance: Chapter 317
First Anime Appearance: NA
Hidden Village: Formerly Mist
Rank: Mizukage
Bijuu: Three-Tailed Turtle Demon
Status: Captured
Info: Akatsuki tracked down the location of the Sanbi, the three-tailed demon, which has the characteristics of turtles and shrimp. In the past, the Sanbi was imbued within Yagura, the Yondaime Mizukage. When Akatsuki captured it, Sanbi was "in the wild," with no Jinchuuriki host. For this reason he was weaker, as he could not properly control his power. Tobi was assigned to capture this demon and did so with the assistance of Deidara. This demon was succesfully sealed in the King of Hell by the group.
3 Tail
Roushi and Yonbi
Roushi First Manga Appearance: Chapter 353
First Anime Appearance: Shippuuden Episode 121
Hidden Village: Rock
Rank: Unknown
Bijuu: Four-Tailed Demon Ape
Power: Youton Ninjutsu
Drawbacks: Unknown
Status: Captured
Info: Roushi contained the four-tailed demon, which took the form of a large lava-emitting gorilla.. He was made a Jinchuuriki by Hidden Rock, at some point he and his village parted company. He travelled the world to try and understand his powers. He used his Bijuu to create Youton (Lava Element) Ninjutsu, a combination of Earth and Fire Elements that created a lava which could melt through anything. He was defeated in battle by Kisame.
4 Tail
Han and Gobi
Han First Manga Appearance: Chapter 420
First Anime Appearance: NA
Hidden Village: Rock
Rank: ?
Bijuu: Five-Tailed Demon Whale-Horse
Status: Captured
Info: Akatsuki captured Han and his Bijuu at some point in the past. The demon takes the form of a whale-horse hybrid. It is unknown which Akatsuki member captured the demon. Two of the unseen captured Jinchuuriki's were outcasts, who were abandoned by their village when Akatsuki came to capture them.
5 Tail
Utakata and Rokubi
Utakata First Manga Appearance: Chapter 420
First Anime Appearance: Shippuuden Episode 144
Hidden Village: Mist
Rank: ?
Bijuu: Six-Tailed Demon Gastropod
Status: Captured
Info: Akatsuki captured Utakata and his Bijuu at some point in the past. The demon takes the form of a slimy slug. It is unknown which Akatsuki member captured the demon. Two of the unseen captured Jinchuuriki's were outcasts, who were abandoned by their village when Akatsuki came to capture them. This individual may have been one of the outcasts.
6 Tail
Fuu and Shichibi
Fuu First Manga Appearance: Chapter 420
First Anime Appearance: NA
Hidden Village: Waterfall
Rank: ?
Bijuu: Seven-Tailed Demon Rhino Beetle
Status: Captured
Info: Info: Akatsuki captured Fuu and her Bijuu at some point in the past. The demon takes the form of a beetle with six wings and one cerci acting as its tails. It is unknown which Akatsuki member captured the demon. Two of the unseen captured Jinchuuriki's were outcasts, who were abandoned by their village when Akatsuki came to capture them. This individual may have been one of the outcasts.
7 Tail
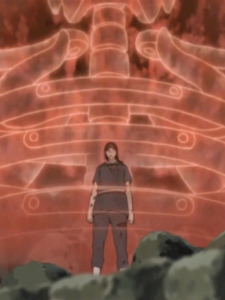
Killer Bee and Hachibi
Killer Bee First Manga Appearance: Chapter 408
First Anime Appearance: Shippuuden Episode 142
Hidden Village: Cloud
Rank: Unknown (Probably Jounin)
Bijuu: Eight-Tailed Demon Ox-Cephalopod
Power: Mini-Hachibi form ~ protective Hachibi chakra taking ox-cephalopod form, gigantic chakra and power boost to Bee
Status: Active
Info: Akatsuki has yet to find and seal two Jinchuuriki: Naruto and the Hachibi Bijuu named Kiraa Bii (Killer Bee). After Uchiha Madara swayed Sasuke to his side, he sent the young man after this Bijuu. Killer Bee posseses the ability to become his Bijuu, that of a tentacled ox beast. He was eventually knocked out by Sasuke's Amaterasu and taken for sealing. His body was revealed as a transformed tentacle, while the real Bee was still safe in Lightning. This allowed Bee to escape capture and evade Akatsuki.
8 Tail
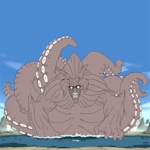
Uzumaki Naruto and Kyuubi
Naruto First Manga Appearance: Chapter 1
First Anime Appearance: Episode 1
Hidden Village: Leaf
Rank: Genin
Bijuu: Kyuubi no Youko (Nine-Tailed Fox Demon)
Power: Mini-Kyuubi form ~ protective Kyuubi chakra taking fox form, gigantic chakra and power boost to Naruto
Drawbacks: Excessive use of Kyuubi destroys Naruto's body and makes him a mindless killing machine
Status: Active
Info: Yondaime Hokage imprisoned the Kyuubi within Naruto after it attacked Konoha. Like many Jinchuuriki, Naruto led a lonely life. Over time though, he gained friends and left his life of despair behind. He has been trained by the Sannin Jiraiya to make full use of Jinchuuriki gifts. He later trained alongside Killer Bee to fully master control of the Kyuubi chakra.
9 Tail

AZURE KNIGHTS

AZURE KNIGHTS
Haseo The azure knight